Pop Art Photo
Gustavo Jacinto
 Final result
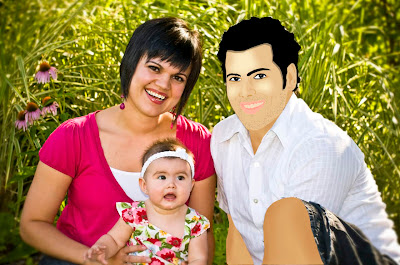
Let's start
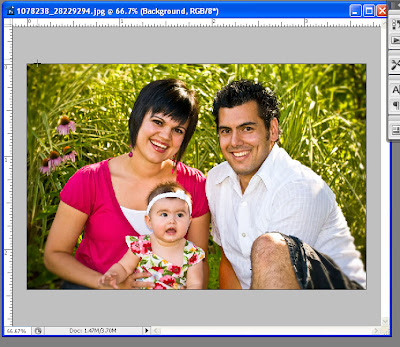
step 1 :open the image by photoshop and readjust the size of image as you want >for me 800 as wide is good

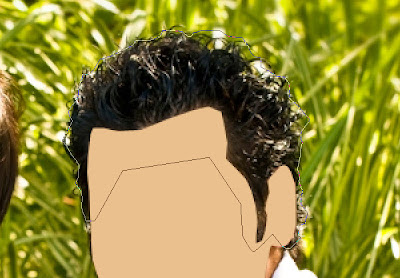
step 2 : Create a new layer over the image and name it "Face" Then grab your Pen Tool (P), and make sure it's set to Paths.
 after select pen tool make path for the face as shown in the image below >>take care about the ear
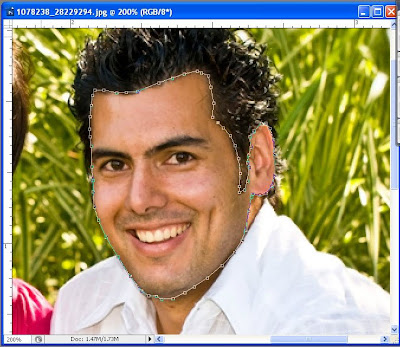
step 3 : then attach the first point u start with it with the final point after using pen tool
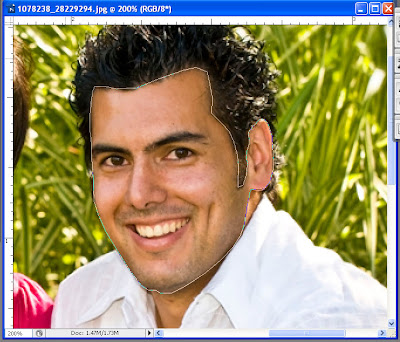
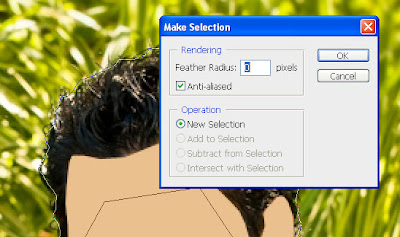
step 4 : then made right click on the selection and chose Make Selection >>Then chose (0) pixel for feather as shown in the second image
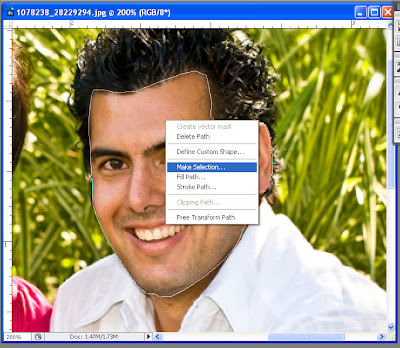
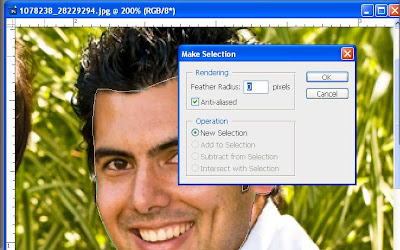
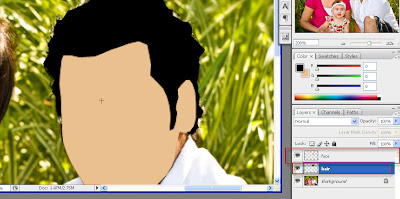
step 5: as shown below all face parts are selected then fill the area of selection with colour #decfb8 so as the image look like the image below
(((take care that u must have agood selection for the face to give nice colour )))
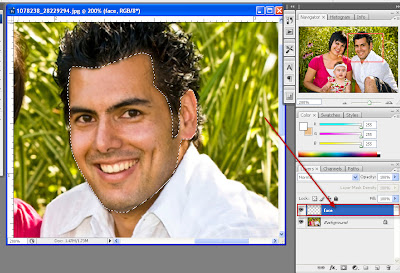
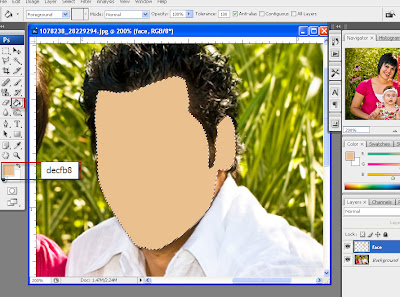
step 6: make anew layer name it "Hair" then place it under the face layer for good control and with the Pen Tool(p) make selection to the hair part of the man as shown in the image below then right click and Make Selection and (0) as feather and fill the selection with Black colour
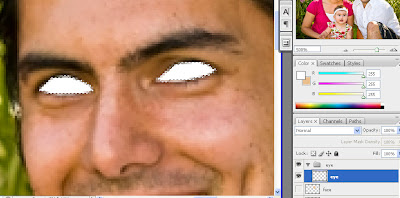
step 7 : make anew layer name it "EYE" and select it and press ctrl+G as eye layer will be grouped in afolder rename the folder "EYE" and on the eye layer chose Pen Tool and make selection around eye as shown in image below and as above right click and Make Selection then (0) as feather and OK >>>>>then fill the selection area with White colour as shown
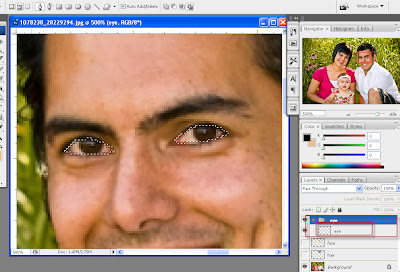
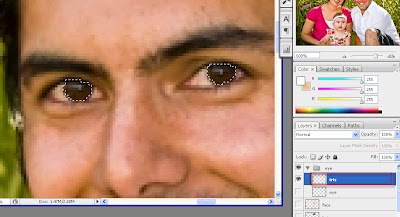
step 8 : INSIDE THE FOLDER "EYE" make new layer name it "Iris" and note that ((in every step you make you must remark the all layer below as invisible as here you must keep all layer as face ,head and eye as invisible so that you can see the Iris layer ))
on the Iris layer chose Pen Tool and make selection around eye as shown in image below and as above right click and Make Selection then (0) as feather and OK >>>>>then fill the selection area with Black colour as shown
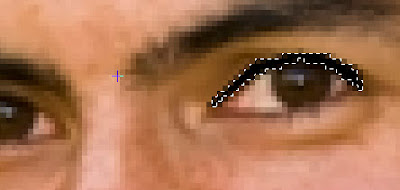
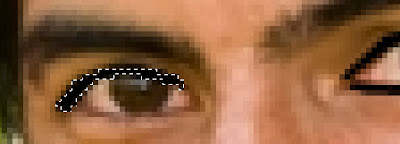
step 9 :INSIDE THE FOLDER "EYE" make new layer name it "EyeLash"on the EyeLash layer chose Pen Tool and make selection as shown in image below and as above right click and Make Selection then (0) as feather and OK >>>>>then fill the selection area with Black colour as shown >>you can use the images below as references to give nice appearance to the eye
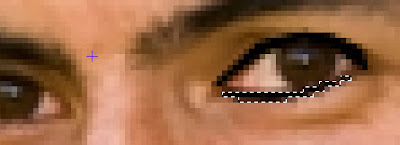

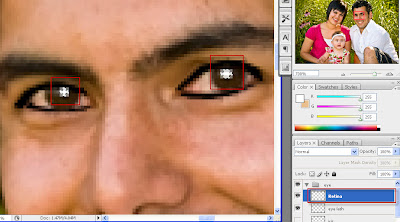
step 10 : INSIDE THE FOLDER "EYE" make new layer name it "Retina"on the Retina layer chose Pen Tool and make selection for the light on the eye as shown in image below and as above right click and Make Selection then (0) as feather and OK >>>>>then fill the selection area with White colour as shown
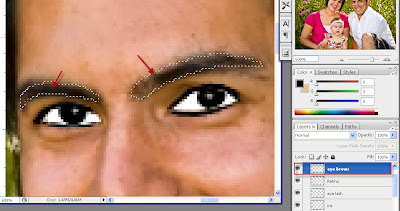
step 11 : INSIDE THE FOLDER "EYE" make new layer name it "EYE Brows"on the EYE Brows layer chose Pen Tool and make selection for eyebrows as shown in image below and as above right click and Make Selection then (0) as feather and OK >>>>>then fill the selection area with Black colour as shown
step 12 :then make anew layer NOT in the eye folder and rename it to "BODY" and place it in between the Face and the Hair layers then with the Pen Tool(p) make selection to the body parts of the man as shown in the image below then right click and Make Selection and (0) as feather and fill the selection with #decfb8 colour >>as you see it will look like the face and it make it hard to differentiate them from each other <<
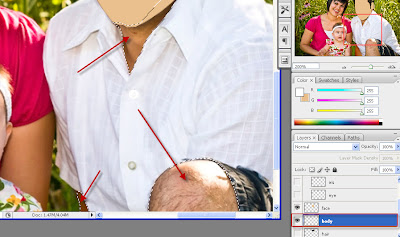
so that you maust have to darken it soo>> press Ctrl+ M so curves app will appear just drag the line as shown in the image and then press OK ((you van see that the body parts become mote darker than the skin of the face))
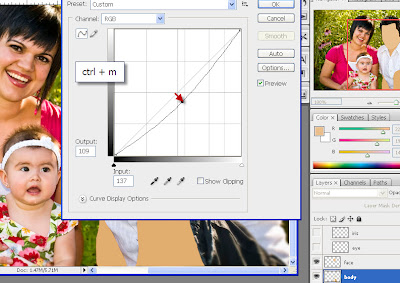
step 13 : it is time to give some real appearance for the eye >>> on the FACE layer first make it as invisible then with the Pen Tool(p) make selection as shown in image below as some parts around the eye then right click and Make Selection and (0) as feather>> >>then make the Face layer visible as shown in the second image as the same selection appear >>then press Ctrl+M and drag the line just awide as shown in the image below so that this part will become just darker than the whole skin ((which give some reality to the face))
NOTE make the same steps again for the other eye
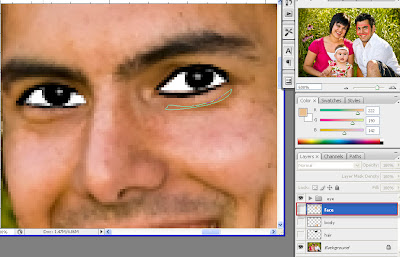
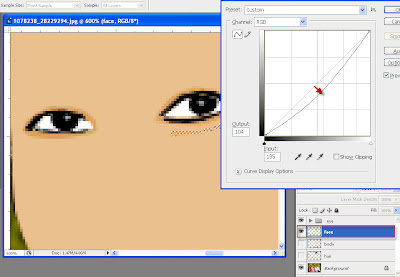
NOTE :as shown in the image adarken area around the all eye you can meke it by the same way
step 14 : Also on the FACE layer first make it as invisible then with the Pen Tool(p) make selection as shown in image below as the NOSE openning then right click and Make Selection and (0) as feather >>then make the Face layer visible as shown in the second image as the same selection appear >>then press Ctrl+M and drag the line just awide as shown in the image below so that this part will become just darker than the whole skin
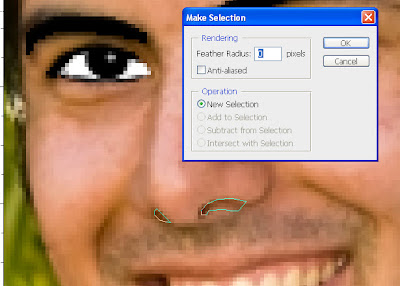
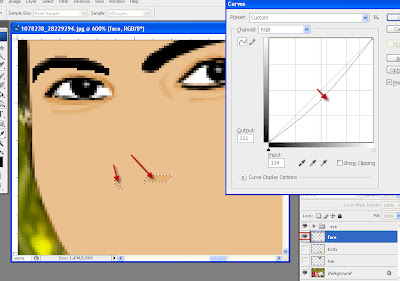
ALSO by the same way as shown in the image below on the FACE layer first make it as invisible then with the Pen Tool(p) make selection as shown in image below as the NOSE sides then right click and Make Selection and (0) as feather >>then make the Face layer visible as shown in the second image as the same selection appear >>then press Ctrl+M and drag the line just awide as shown in the image below so that this part will become just darker than the whole skin
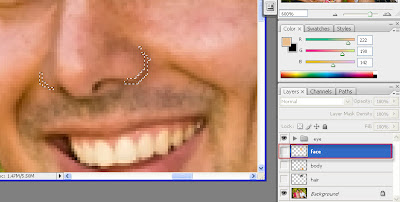
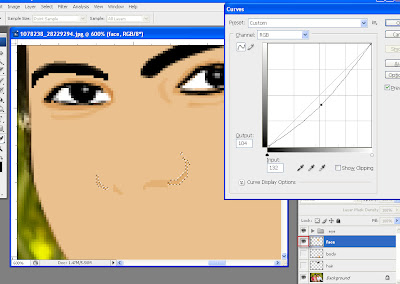
step 15 : And There Is The Most Important Step in this tutorial as you must do some thing that give anice appearance to the whole face
First on the FACE layer make it as visible then reduce the opacity to 60 so that you can see the nose of tha man then with the Burn Tool (0) and Exposure to around 25% make the whole shape of the nose as shown in the image below
NOTE: may you have to duplicate the Face layer first and make the copy layer as invisible so if you have something wrong with the first you can easily back to the copy one
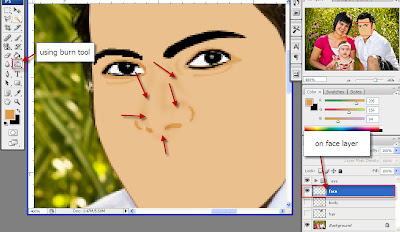
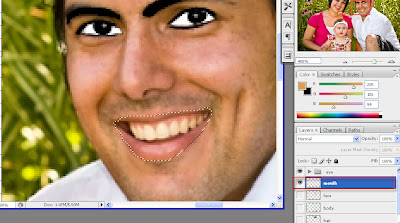
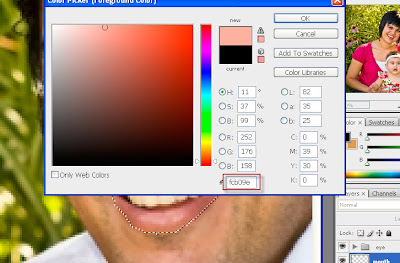
step 16 :Then make anew layer and rename it as "Mouth" and make it above the Face layer and with the Pen Tool(p) make selection to the whole mouth of the man as shown in the image below then right click and Make Selection and (0) as feather and fill the selection with #fcb09e colour
step 17: make anew layer and rename it as "Teeth" and make it above the Mouth layer and with the Pen Tool(p) make selection to the Teeth of the man as shown in the image below then right click and Make Selection and (0) as feather and fill the selection with White colour
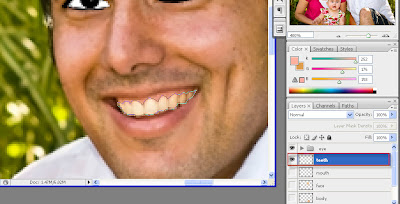
AS you will find something wrong in the image so you can adjust it to be look like the image below as there is GUM between the Teeth and the Lips you can make it in anew layer name it as "Gum" and place it between Mouth layer and Teeth layer and fill it with acolour that is somewhat darker than the mouth as shown in the image below
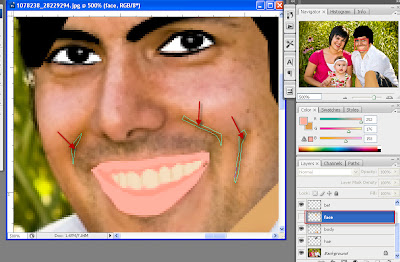 step 18 :Also on the FACE layer first make it as invisible then with the Pen Tool(p) make selection as shown in image below as the part of the face which give the meaning of smile to the image then right click and Make Selection and (0) as feather >>then make the Face layer visible as shown in the second image as the same selection appear >>then press Ctrl+M and drag the line just awide as shown in the image below so that this part will become just darker than the whole skin
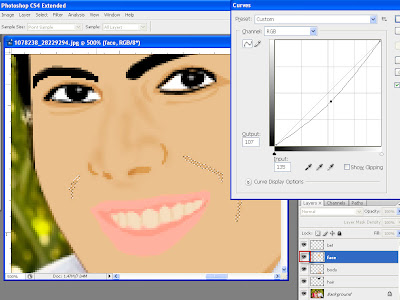
step 19 : Finally give some shinning app. to the face..... Also on the FACE layer make it visible then using Pen Tool(p) make selection as shown in image below then right click and Make Selection and (6) as feather>> then OK
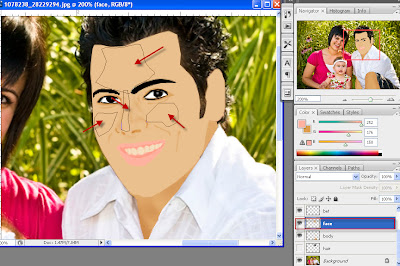
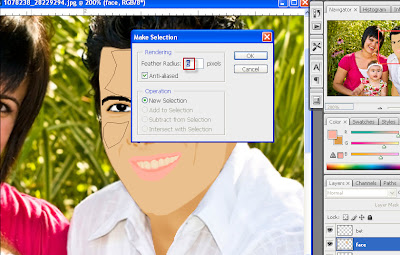
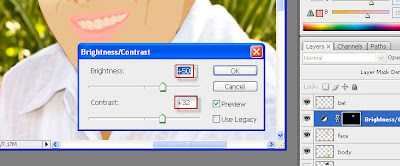
step 20 : AS shown in the image below chose from this list Brightness/Contrast
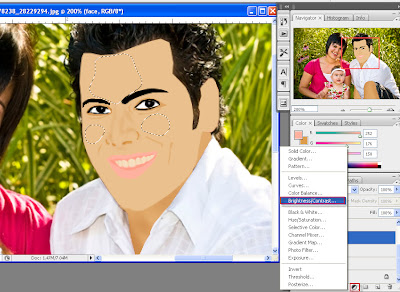
use the values of Brightness >>+50 Contrast>>+32
Final Result

Friday, October 31, 2008 | 0 Comments
Space ُEffect
Fabio Sasso
download PSD file for this tutorial
الصوره النهائيه
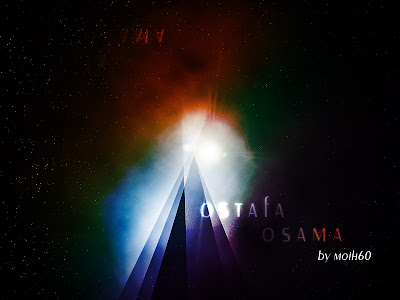
Step 1
Create a new document, (800x600 pixels) so I can use it as a wallpaper later. Add a new Layer and fill it with any color then go to Layer>Layer Styles> Gradient Overlay. You can add a gradient layer as well, I simply prefer the Layer Styles.
Step 2
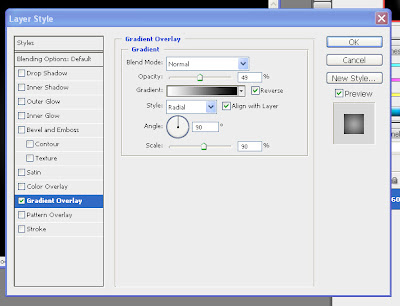
as explained in the image below adjust all measures as the imageblending mode>>normal
opacity>>50
radial style with angle 90 and scale 90
Step 3
Create a new layer and fill it with white, then go to Filter>Render>Lighting Effects. Change the style to RGB lights. Use Negative 60 for the Intensity, Narrow 96 for the focus, and for the other options keep the same.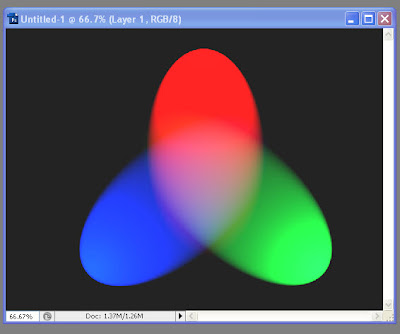
Step 4
Lets add some blur, go to Filter>Blur>Gaussian Blur. Use 80 pixels for the Radius. The last thing here will be change the Blend Mode to Overlay. Doing that the RGB color will be hardly visible but later on with the other layers it will work
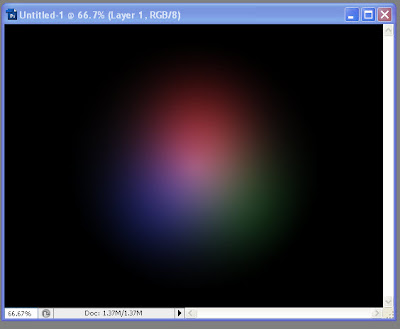
Step 5 - Creating Stars
Creating Stars in Photoshop is something really easy. Create a new layer, fill it with black, and change the Blend Mode to Screen. After that go to Filter>Noise>Add Noise. Use 10% for the Amount, Gaussian for the Distribution and select Monochromatic. You will have a layer full of noise, then to create the start just change the levels of the layer, go to Image>Adjustment>Levels. For the Input Levels use 65, 1.00, 99. Doing that you will increase the black so just the bigger dots will appear, also you will increase the white, making the dots that appear brighter.
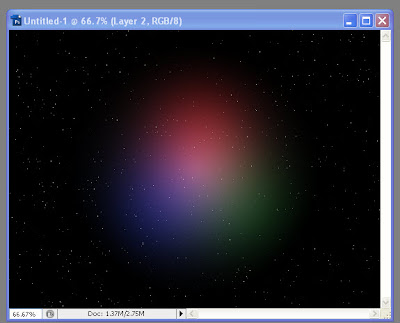
Step 6 - Nebula
lets create the Nebula. To do that create a new layer and go to Filter>Render>Clouds. Make sure that your color were black and white for the background and foreground. Then just add some Layer Styles to do that go to Layer>Layer Style. First over the Blending Options, change the Blend Mode to Overlay. After that select Gradient Overlay. use Overlay for the Blend Mode and for the colors use a Cyan, Green, Yellow, and Red or whatever you have . Also change the Angle to 130º and the Scale to 49%.
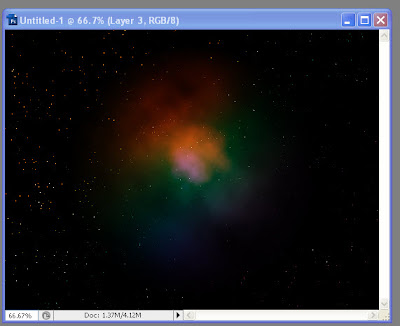
Step 7 - Lens flare
First, lets create a new layer and fill it with white, however, this time, add this layer in front of the background and beneath the other layers: (Stars and Nebula). Now go to Filter>Render>Lens Flare. For the settings use 100% Brightness and use 105mm Prime for the Lens Type.
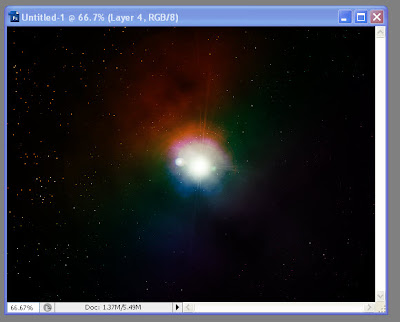
Step 8 - Rays of Light
Now lets create the "M" of ray of lights. So create a new layer in front of the Lens Flare. Then select the Rectangular Marquee Tool (M) and create a rectangular including the lower half of the image. After that select the Brush Tool (B). We will use a very big brush, 800px diameter and hardness 0%. Select white for the color and with just like a a bit of the brush inside the marquee (red circle) give a few clicks on the mouse button.
يعني اعمل سيلكشن علي الجزء الاسفل من الصوره بعد كده اختار فرشه كبيره مقاسها 800 او اكتر حتي تصبح الفرشه تاخذ جزء في الصوره كما في الصوره بعد ذلك اضغط 2 او 3 كليك
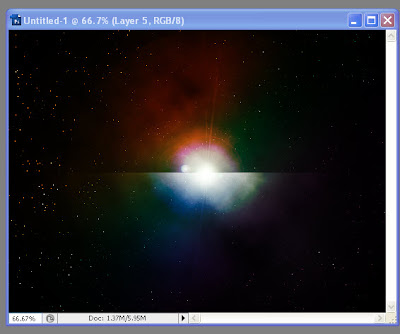
Step 9
Now it's just about duplicating, resizing and rotating. The tip here is convert the original ray of light layer to Smart Objects, so you will be able to resize and rotate in a non-destructive way. After you create the "M", change the blend mode of the elements to Screen and use 80% opacity.
after make such ray in the new layer >>its time to duplicate ,rotate and resize these rays til u have your shape
Step 10
And the final image will be like this
Thursday, October 30, 2008 | 1 Comments


